

Dropping into the drainage that parallels Northshore Road. Panko Peak visible right of center.
Navigating the drainages until we got to the base of Panko Peak. There were some Class 2/3 obstacles to get through the drainages.
At the base of Panko Peak. The route we took heads to the right to the notch visible top right in this photo.
I stepped back to get a shot of the route. Visible center is the saddle we ascended to from the previous photo. The opening on the left is the "funnel" feature that we would use. You can see the mellow slope above and to the right of the "funnel" that would get us to the summit ridge.
Yossi entering the funnel.
The funnel.
Class 2/3 up the slope on fun rock.
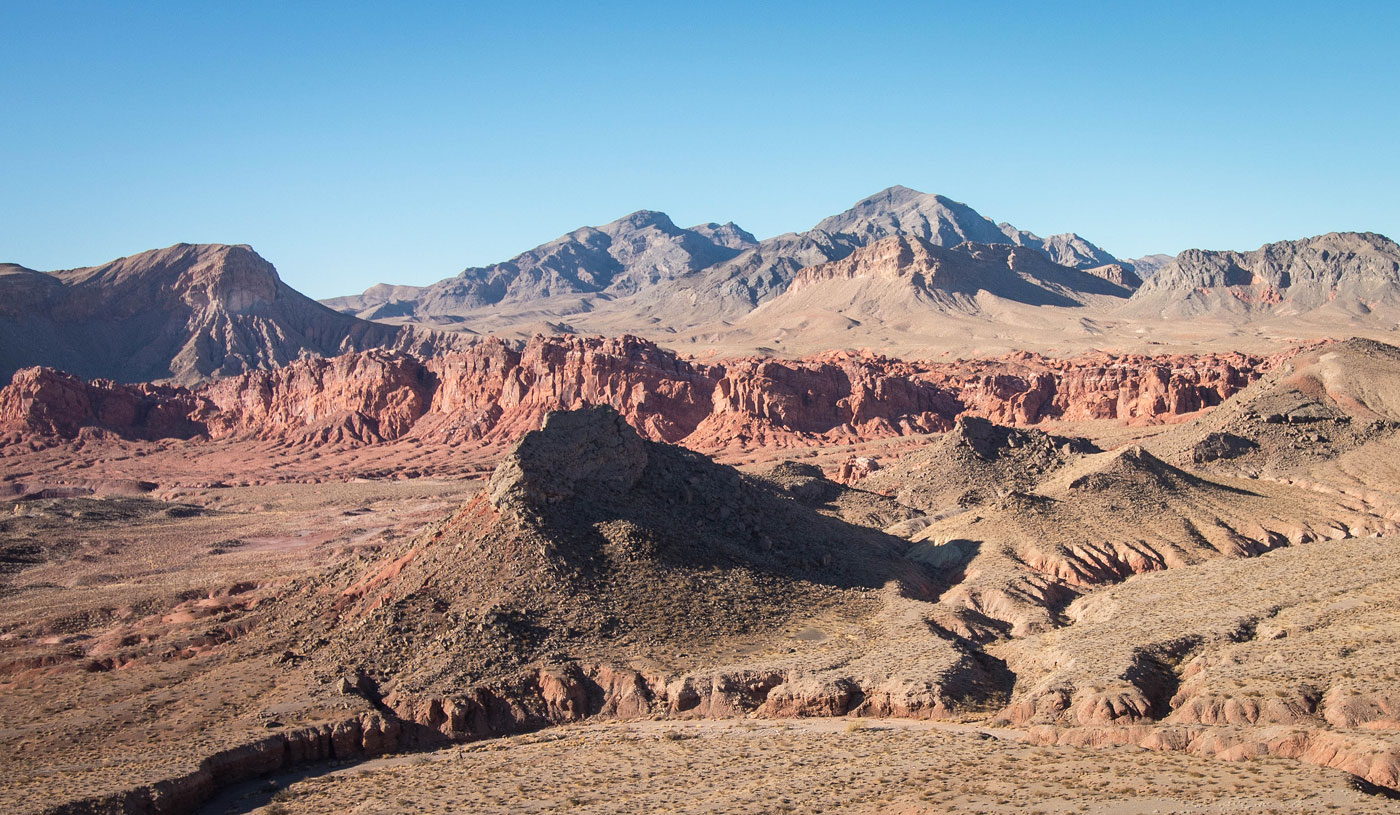
Summit ridge, Panko Peak visible on the right.
Back at the saddle after the "funnel". Our descent route heads to the north through the canyon visible on the right in this photo.
Looking back up the canyon. It actually somehow worked out!
Following a wash after descending from Panko Peak.
We bisected a dirt road.
And then headed up to Peak 2421 via a minor drainage. You can see the blocky rock slope ahead and the slabs guarding the summit in the center.
Blocky Class 2 stuff.
At the base of the slabs. We followed them to the left until we could locate a Class 2 option to the summit.
Class 2 slab.
Peak 2421 summit, view toward Panko Peak. You can see the fun canyon we descended from in the center.
Peak 2421, view north. Peak 2380 on the right, Fire Cliffs left, Muddy Mountains top left.
Base of Peak 2380. We ascended to the boulders on the left of the red spot toward the summit, where we located a slab.
Class 2 slab.
Looking down at Yossi ascending the slab.
At the top of the slab, a fun little knife-edge. The slab we ascended is visible bottom left.
Looking back at the knife-edge from Peak 2380's summit.
Yossi on the knife edge.
Back at the base of Peak 2380 (I recommend not trying to go down another way - the southwest slope is the least riddled with cryptobiotic soil and drainages), looking toward the open desert toward the Fire Cliffs. We headed to the canyon right of center.
Heading to the canyon right of center.
Some obstacles within some minor drainages as we near the mouth of the canyon.
Entering the mouth of the canyon.
Looking back as we play on Class 2/3 boulder-hopping obstacles.
Farther up the canyon.
Looking back as we get higher.
Right leads further up the canyon, where we were stopped by a dryfall. Left is the Class 3 option we used to exit the canyon. Yossi is over there looking at a viable scramble.
Yossi on the stiff Class 3 move out of the canyon.
Just after the Class 3 move, we headed through a sandy wash into the heart of the Fire Cliffs. Around the bend ahead, we stayed left.
On the left, we encountered the crack on the left. We headed in and hopped over the boulder at its end.
We emerged from the crack on the right and continued up.
We made it into the Bowl of Fire!
Navigating fun, colorful rocks and washes.
Looking back as we near the base of Fire Cliffs High Point. Southgate Peak visible top left, Muddy Mountains top right.
Fire Cliffs High Point ahead on the right.
Close-up of Fire Cliffs High Point. The route began up the crack in the center. Note the canyon on the left - I recommend going through it to get a great view (photos of this after).
First we started up Fire Cliffs High Point via the crack.
Just above the crack, a wide, somewhat exposed ledge.
And then a Class 3 move to gain the summit.
Looking down at Yossi on the Class 3 move to the summit of Fire Cliffs High Point.
Fire Cliffs High Point summit, view west. Southgate Peak visible top right.
Back off Fire Cliffs High Point, heading through the canyon on its left.
Amazing view on the rim of the Fire Cliffs.
View east.
View west.
We started through the Bowl of Fire to head back.
Along the standard route people use into the Bowl of Fire. View looking toward Fire Cliffs High Point on the right.
Shot of the head of the canyon where we ascended earlier. The dryfall that stopped us is right there in the shadowy spot - it was so close to being a direct route, but we liked our alternative.
Heading through Bowl of Fire on the standard route.
Shot toward the Fire Cliffs.
We followed the standard trail back into a major wash heading south, then headed east up to Lego Peak, visible here.
Blocky ascent to Lego Peak.
Class 2+ dihedral move to gain the summit.
Dihedral move, view back toward Fire Cliffs.
Close up toward Peak 2380 and Fire Cliffs. Muddy Mountains visible top center.
Lego Peak summit, view toward Panko Peak (right) and Northshore Peak (top center).
We dropped off the considerably less blocky slopes of Lego Peak's east side and headed along the ridge in the center to get up to the Northshore Hill Trail.
Looking back as we ascend to Northshore Hill. Panko Peak visible top left. Lego Peak visible top right.
Northshore Hill Trail visible below. We followed it back to the car.
Hire me or show me some love!
Hire/refer me as a web developer or send me a few bucks if you find my site useful. I’m not sponsored, so all fees are out-of-pocket and my time preparing trip reports is unpaid. I really appreciate it!