I need to offset my substantial website costs somehow! You can download a hike/drive GPX to assist you here. Before sharing my GPX tracks with others, please remember my site is otherwise a free resource.
GPX track added to your cart.
Nov 29, 2021 — Finally back for more! Five years ago (wtf how) Shawn and I hiked Bridge Mountain with minimal information about what seems like the standard route and I managed to have one of the most terrifying and stupid ascents of my life. The route described here is a much more fun and far less dangerous, and also allows for easy access to G2, Bridge Mountain's neighbor. That all being said, I highly recommend getting Bridge Mountain using this route rather than that previous trip report. I'm normally not thrilled about repeating hikes, but this area is gorgeous and I had a bone to pick with this peak. Thanks to Sam Grant for finding this route and passing the info to me.
Luke and I had a massive plan for today, but ultimately only ended up hiking G2, Bridge Mountain, and added on Destination Point (not to be confused with the more popular Destination Peak). We set out to the south within Gifford Canyon. To access it, a social trail leads into the Pine Creek drainage, then a slab leads up to another social trail that wraps into Gifford Canyon. The going is straightforward for a mile or so, some light Class 2 and sandy walking accompanied by the ever-changing detritus caused by flash floods. The west side of the canyon starts off by being unclimbable, but slowly the cliffs give way to more mellow slickrock terrain. The goal is to ascend the slickrock to a pretty bowl located just east of the sandy ridge that houses Destination Point. The bowl is obvious and massive. Leaving Gifford Canyon in order to reach the bowl has always been an inconsistent endeavor for me. I don't think I've ever taken the same route up or back down. Starting out of Gifford Canyon too early can mean getting confused on the cliffy terrain, but leaving too late leads to Class 3/4 moves that, while doable, are far more work than necessary. After starting up and ascending a few hundred feet on Class 2/3 moves on pleasant slickrock, we found a lightly cairned route. I recommend ascending to the headwall far above, where we then picked up a social trail that led south along the cliff face. The social trail then wrapped around into the bowl and disappeared on the slickrock. On past trips, I've asended through the bowl's south side to get up to the sandy ridge, but that's always felt a bit out of the way. Instead, Luke and I ascended a nice little slickrock offshoot with a single Class 3 move in order to reach the sandy ridge, where we got out first view of G2 in the distance. Destination Peak was visible to the right, and Gifford Peak to the left. The route to come drops between the two into a canyon, but to reach this canyon there was some work to do.
After dropping west from the sandy ridge, we immediately had to deal with Class 3 obstacles and some inconvenient work-arounds to avoid short cliffs. This is another section that I haven't found a consistently good route on, despite doing it at least 3 times. I'm not sure anyone really knows of the best way down, so choose your own adventure, careful not to descend too far. The cliffy terrain evens out, still far above the canyon. Rather than continue deeper into the drainage where cliffs will block progress, wrap to the north toward the base of Destination Peak. A headwall that looks unclimbable gives way via a set of switchbacks on its ledges (Class 3). Just past this a steep slickrock ramp appears to the south, and it leads safely and directly into the canyon below (Class 2).
Now within the canyon separating Destination Peak and Gifford Peak, we continued through a short section of narrows and through the mouth, now entering Hepworth Wash. We took Hepworth Wash north, sticking to the main drainage despite its slower-moving sandy footing to avoid the brushy stuff on its banks. Hepworth Wash became less sandy and more grassy, but still easy to follow. We continued until a major side-drainage popped out on the left and we headed into it. Along the way we encountered a couple of Class 3 moves on small cliffs, but anything more significant can be avoided. The drainage became a little choked with downed trees as we neared the base of Bridge Mountain, but it beats the alternative, bushwhacking on the higher ground.
We made it to the drainage separating Bridge Mountain from G2 and we headed up, Class 2 turning into 2+ as the drainage steepened and became more sandy and rotten. We passed the start of the ascent route Shawn and I had taken on our previous trip up Bridge Mountain and I shivered, happy I never would have to do that nonsense again. Once at the saddle of G2 and Bridge Mountain, we decided G2 would be first. It would give us a better perspective toward the south slope of Bridge Mountain from afar. So, we headed south first, side-hilling on pleasant slickrock until the base of G2.
G2 is basically just a big sandhill with a few small cliff obstacles. It's not a bad peak by any means, but it's steep and loose and boulders seem to just fall away when you step in the sand that holds them in place. We ascended the first bit of the slope and pulled only Class 2/2+ moves, avoiding little cliffs that would make the going more difficult. We made it to a fixed piece of webbing tied to a tree at the base of a Class 4 section. This is by far the crux of the route to G2. Neither Luke nor I needed the webbing, but we were happy it was there. Don't expect it to be in good shape when you visit, though. The rock was solid and the exposure nonexistant. It's just about 10-15 feet of climbing. Past the crux, the slope became more steep and sandy and now introduced some brush. Fortunately there were small sections of slickrock, but we were surprised at how much ascending we still had to do past the crux. On the way up we pulled a couple of Class 3 moves, but were able to keep this section Class 2 on our way down.
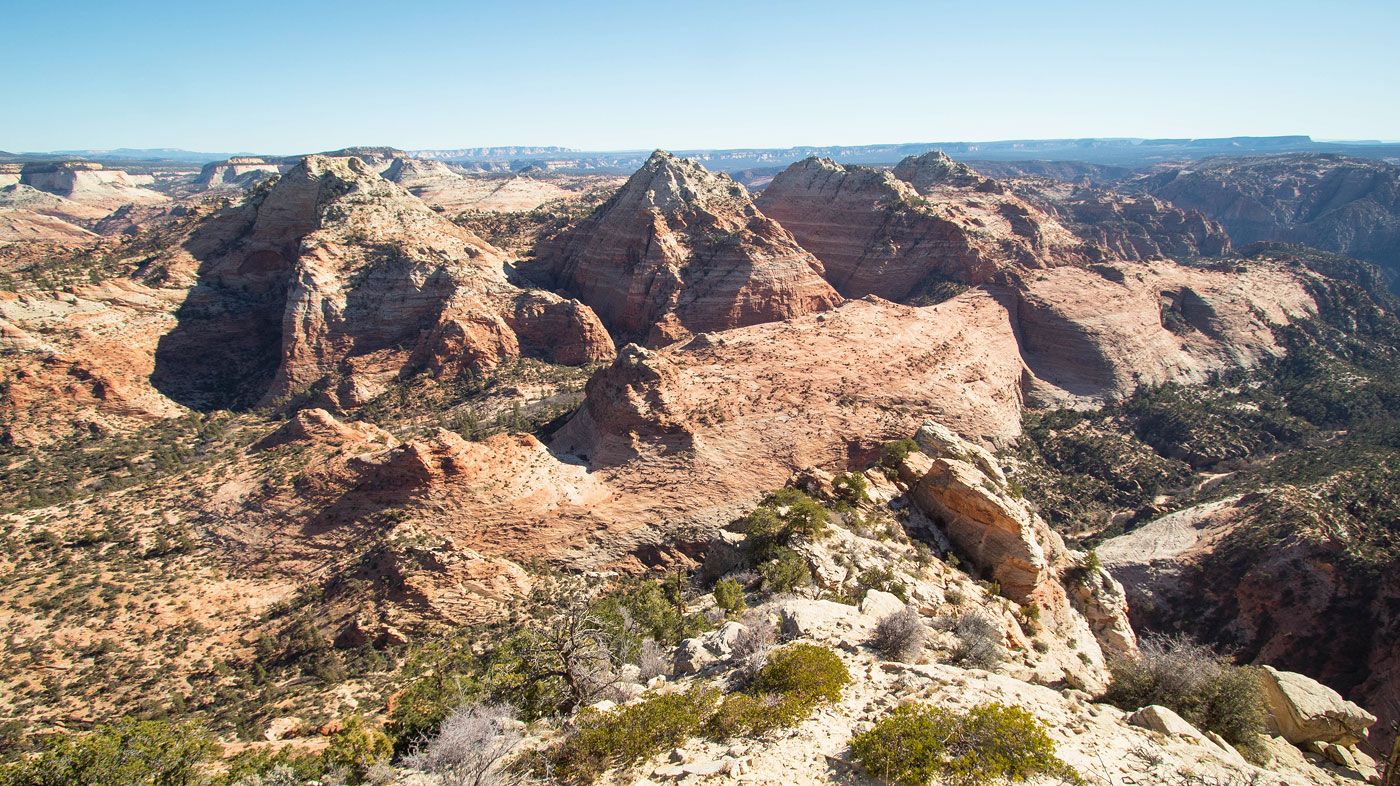
The summit of G2 was incredible giving perspective of all the peaks in the area, even including the Watchman massif. Our initial plan for the day was to attempt a route to Whale Peak from the wash below, but seeing its substantial cliffs from up here and the potentially grueling undertaking had us nix the idea. We backtracked to the saddle of G2 with Bridge Mountain.
Sam said he used a rope for Bridge Mountain via its south slope. Luke nor I are particularly thrilled about scary sandstone slabs. I had my previous horrifying experience on Bridge. If you haven't gotten the hint yet, our nerves were a little jostled. Regardless we started to the base of the peak, then headed left along its cliff band. To the right was impossible terrain. We immediately got to a steep crack, the first crux of Bridge Mountain. We started up, pulling a Class 4 move in a short chimney. Past this was a Class 3 short ledge followed by a short slab that led into a small nook. Within the nook was a Class 4 crack that we had to squeeze up. Some might call ths Class 5, but it isn't scary nor exposed, just a short section of stemming up a crack. Past the crack was a delightful-looking Class 2/3 ascent on steep sandstone blocky terrain. There are certainly loose rocks, but we were able to make hundreds of feet of upward progress quickly and without issue nor exposure.
Eventually we made it to a headwall, still a couple hundred feet below the summit. We headed left along the base of the cliff and wrapped around to the southwest side of Bridge Mountain, where we could see Springdale from above. Of course, later that day we inspected our route from Springdale to see if we could make out where we were, but it all looks like impossible terrain from below. Anyway, now on the southwest side, we kept our eyes peeled for an ascent option over the headwall. We tested a couple of options, but settled on the one pictured below. There were two options, a Class 3/4 set of moves that feels quite a bit exposed, or a Class 4+ set of moves that avoided the exposure. I went up the latter and down the former, unsure I could manage a safe descent on the Class 4+ option. Luke did the more exposed option up and down. We emerged past this crux onto flatter, sandy terrain and Bridge Mountain's summit block came into view. It will be important to remember where you asccended, since on the way back it will be hard to locate this exact spot.
Class 2/3 terrain led to Bridge Mountain's summit, where we high-fived multiple times. It felt like the completion of a story for me in a lot of ways, being five years since my last ascent of Bridge Mountain. I'm much more accomplished at route-finding and scrambling, I'm more familiar with Zion and its peaks, and returning in a more safe fashion to this peak just tickled me in all the right places. Luke seemed overjoyed to have gotten up this one as well.
We backtracked all the way to the complex terrain separating Destination Peak and Gifford Peak, intending to just return the way we came. However, we kept too far to the left (north) and found ourselves unable to access the sandy ridge. Invisible on a topo map, a significant crevasse forced us to ascend farther. We realized we ascended far enough to be just below a minor peak, Destination Point. We shrugged and decided to go the extra couple hundred feet to its summit, then descended to the south on easy Class 2 terrain to the sandy ridge. From here we were able to backtrack successfully into Gifford Wash.
Please consider helping me out if you find my site useful. I'm not sponsored, so all site fees are out-of-pocket and my time preparing these trip reports is unpaid. You can also hire me as a web developer. I really appreciate it!
If you find my site helpful, please help me replace my many broken cameras, fund my website fees (hosting, APIs, security), or just support my countless hours of work. I pay for all expenses myself, and all trip reports I post are unpaid and unsponsored, so any support is really appreciated!
If using PayPal, please select their option for "Sending to a friend" so they don't take out fees, thank you.