

At the end of the ATV road at the border of Havasu National Wildlife Refuge. Some minor volcanic peaks visible on the left.
We headed through the desert on burro trails. The minor volcanic peaks I mentioned previously visible behind Matt.
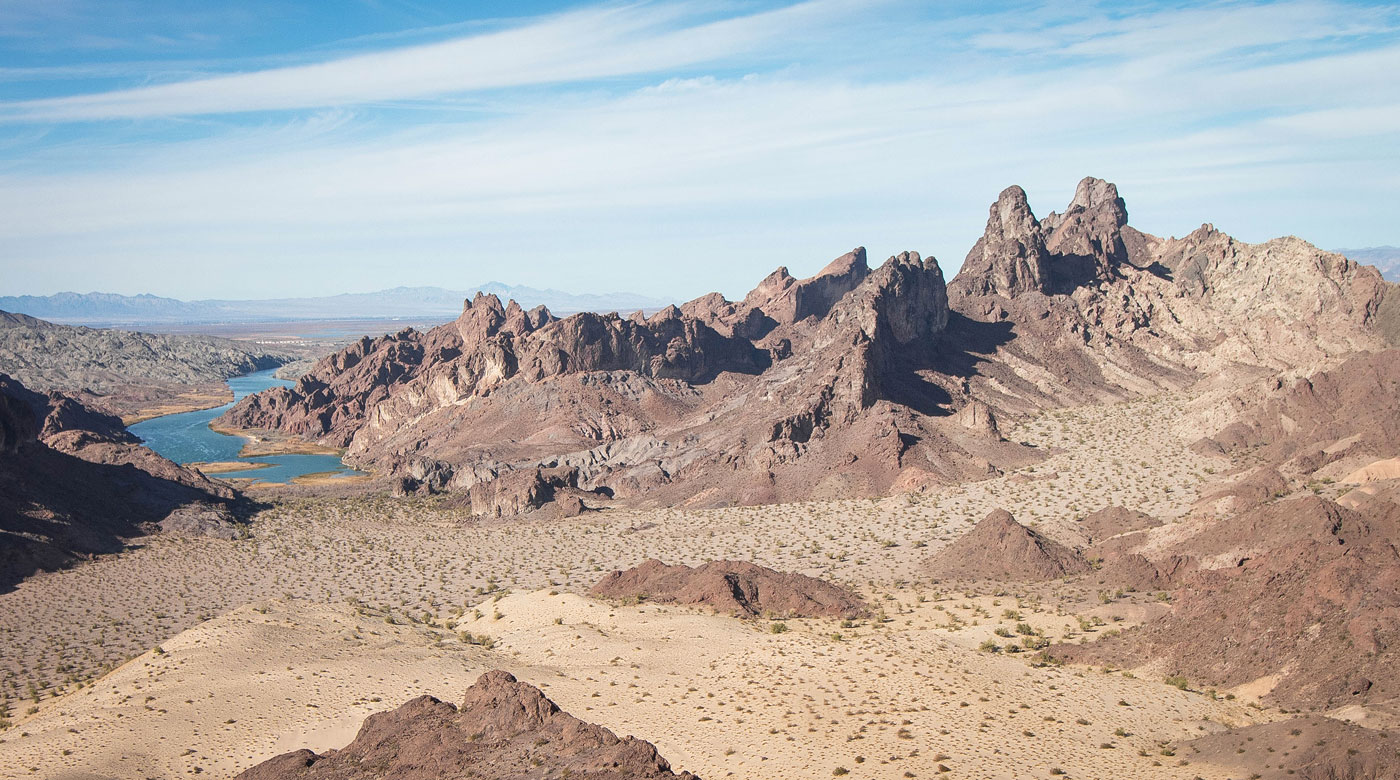
Gold Dome came into view - incredible.
Minor volcanic peaks surrounding Tumarion Wash.
Heading up Jackpot Spring. There was a trickle.
Looking back the way we came past Jackpot Spring as we head up to the saddle of Gold Dome and Havasuper Peak.
Looking back toward the unranked minor volcanic peaks as we ascend to the saddle.
Gold Dome left, Havasuper Peak right. We headed to the saddle in the center.
Approaching the saddle on pretty easy terrain.
At the Gold Dome / Havasuper Peak saddle, view south. South Dome visible left of center. We went to the left along a mining road to get to Gold Dome. The alternative (pink line) heads down the drainage visible in this photo and wraps around Gold Dome on the left.
Mining ruins before we start up to Gold Dome.
Starting up the scrambly cryptic route up Gold Dome. The crevasse I described is visible in the center. You can see the sheer west face of Gold Dome top left of center. Our route headed to the right in this photo.
Class 3 move to get over the base cliffs of Gold Dome. Havasuper Peak visible in the bright sunlight.
Class 2/3 fun up Gold Dome. Peak visible center.
Looking back as we ascend Gold Dome. You can see the crevasse that separated the 4/5th of mountain from the 1/5th of mountain. We dropped into it when we found a good option, and reascended on the opposite side.
Working out of the crevasse and onto the opposite side. West face of Gold Dome is visible top left.
View of Gold Dome's summit area. The crux is on the right.
Matt approaching the Class 4 crux sections of Gold Dome, following the shadowline. You can see a small ledge about halfway up that marks the start of the second Class 4 section.
At the top of the second Class 4 section. The third part of the crux (Class 3+) is to the right in this photo.
Looking down the Class 3+ section. The route comes up from the bright section left of center.
Class 2/3 to the ridgeline.
On the ridgeline, avoiding the knife-edge.
View back along the knife-edge, avoidable on the left side of this photo.
Class 3 stuff along the ridgeline.
Final bit to the summit.
Gold Dome summit, view toward South Dome (right) and Tumarion Peak (left).
Close-up toward South Dome (left) and the Colorado River.
Gold Dome summit, view north toward the way we came into Havasu National Wildlife Refuge.
A shot taken much later to display the route we took up Gold Dome. Red line was our approach, pink line is the less-cryptic option. They both met up at the crux, seen at the top.
Back at the base of the Class 4 section, we dropped down a brushy gully on the south side of Gold Dome.
Heading down the gully. The impossible-looking unranked peak separated Gold Dome and South Dome is visible ahead. We wrapped around it.
Heading up the gully between the unranked peak (left) and South Dome (right).
Looking back at the gully we ascended. Havasuper Peak visible in the distance. You can see Matt on the Class 3 wrap-around. Behind me a bit up the gully is the Class 4+ option.
Class 5 headwall. Shawn had no problem on it, but I certainly wouldn't have wanted to free-solo it.
Close-up of me on the Class 5 headwall just past the Class 3 wrap-around. (Photo by Matt Bloomfield).
Shot looking down the Class 5 headwall. No, we didn't leave our webbing to assist, sorry. We thought we'd need it again later.
This is a shot of the previously mentioned Class 4+ option a hundred feet up the gully from the headwall option. I chose to back down from this and located the Class 5 headwall option. My friends dropped me a line there since I didn't like this Class 4+ option. You can see me scared about to pull the exposed lip move before I decided to bail and look for another route. Both this Class 4+ and the Class 5 headwall lead to the same spot. (Photo by Shawn Pladas)
Just past the Class 5 headwall, a grotto-like feature with a Class 4 move.
Class 4 move up the grotto-like feature.
Just above the grotto-like feature, Gold Dome visible top left. The unranked peak separating them visible top center.
Class 2/3 up the slope.
View back as we ascend South Dome. Havasuper Peak visible top right.
A grassy Class 2 section. Summit visible ahead.
View back again, Gold Dome visible top right.
Class 3 section.
Stiff Class 4+ move over a lip.
Shot down at the Class 4+ move on the lip. It's not as exposed as it looks.
Summit of South Dome, view toward Gold Dome (right).
Summit of South Dome, view toward Tumarion Peak.
Summit of South Dome, view toward Peak 1295 (center), Peak 1042 (right of center), and Peak 1144 (top left above the sand dunes).
Close-up toward the Colorado River.
Beneath South Dome within the drainage separating South Dome/Gold Dome from Havasuper, view toward the break in the insane cliff face protecting Havasuper Peak. We headed up to the Class 2 slope ahead and followed it up to the center of this photo.
Looking back as we ascend to the weakness in Havasuper Peak's southern ridge. South Dome visible right of center. The gully we descended from Gold Dome (or you would use if taking the less-cryptic option) visible left of center. The little peak to the left of South Dome is unranked and likely difficult Class 5, no thanks.
After passing over the break in Havasuper Peak's ridge, this was the view of the ridgeline. Keeping to the crest likely would have been scary, so we stayed low, on the left in this photo.
Looking back as we stay low, beneath the cliffs.
A nice Class 2/3 slab led to the ridge safely.
Looking back as we ascend the slab.
On the ridge of Havasuper Peak. Holy crap - the overhung cliff was stunning and vertigo-inducing. Gold Dome visible on the right.
Looking back along the Havasuper Peak ridgeline. South Dome visible top left.
Close-up of the ridge.
Havasuper Peak summit, view north. Our cars are somewhere top center. The little minor volcanic peaklets we passed earlier in the day visible top center. The drainage leading up from Jackpot Spring visible bottom right of center.
View toward Gold Dome (left) and South Dome (far right). The saddle between Gold Dome and Havasuper Peak (and the old mining road) visible below.
Heading back into the drainage, onward to Peak 1042.
Shot back up the drainage, Gold Dome visible center, South Dome top right.
Continuing down the drainage, Peak 1042 ahead.
Peak 1042. We approached via the slope on the right leading to the ridge.
Looking back toward South Dome.
Slope approach to Peak 1042.
Class 3 move to gain the ridge. South Dome visible top left.
View north as we start up the ridge.
Along the ridge up to Peak 1042.
Another shot north along the ridgeline toward the Colorado River.
A headwall ahead. There is a ramp on the right that descends slightly, leading to a slope out of frame on the right in this photo. Class 2/2+.
Headwall from the previous photo visible on the right, along with the descent ramp. Matt seen left of center along the ridge. Gold Dome, South Dome, and Peak 1295 visible center.
Continuing to the summit of Peak 1042.
Continuing along the ridgeline from Peak 1042. Peak 1144 visible center behind the sand dunes.
Class 2 on the way down from Peak 1042.
View back toward Peak 1042, The Needles visible top right.
We found a route down from Peak 1042 and headed south over the sand dunes ahead.
At the top of the sand dune, view toward Peak 1144.
Class 2.
Likely avoidable stiff Class 3 move.
View back the way we came.
Approaching the summit of Peak 1144.
Summit ahead.
Summit of Peak 1144, view back the way we came. Peak 1042 top left, The Needles top right.
Peak 1144, view south.
Peak 1144, view west.
Peak 1144 view toward The Needles. Next up is Peak 1295, center. We went up the sandy wash on the right.
On the way up Peak 1295, a little arch that provided a nice viewpoint of the Colorado River.
This is a shot back toward South Dome (top right). Havasuper Peak visible enter.
Close-up of Matt looking at Havasuper Peak's incredible cliff.
Class 2/3 to the summit of Peak 1295.
Class 3 move.
Final lightly exposed Class 3 move to the summit of Peak 1295.
Peak 1295 summit, view west.
Peak 1295 summit, view south. Sand dunes visible in the center. I'd love to come back to check them out.
We dropped back to the saddle and headed east. Tumarion Peak visible top right. We took the wash visible center.
We descended from the saddle on the left, which separates Peak 1295 (left out of frame), and South Dome (center).
Ascening the long wash.
View back toward The Needles (Gold Dome right, South Dome left) as we ascend on a burro trail out of the wash. The burro trail dropped us into Tumarion Wash.
Within Tumarion Wash, Tumarion Peak's north face visible on the right.
Ascending to the east ridge of Tumarion Peak on somewhat loose low Class 2 terrain.
Starting up the east ridge of Tumarion Peak.
We stayed to the right of the ridge crest for the most part, avoiding nutty cliffs and drop-offs.
A couple of minor gullies.
View back at our progress up Tumarion Peak.
Final Class 2 push to the summit block.
North side of Tumarion Peak. We needed to wrap around to the north side to access the Class 3 option to gain the summit.
Tumarion Peak summit.
Tumarion Peak, view north.
Close-up toward The Needles from Tumarion Peak.
Tumarion Peak summit, view along the east ridge.
Hire me or show me some love!
Hire/refer me as a web developer or send me a few bucks if you find my site useful. I’m not sponsored, so all fees are out-of-pocket and my time preparing trip reports is unpaid. I really appreciate it!