Hike The Sentinel, Booths Pinnacle, Pyramid Peak, Land’s End Peak Lake Mead National Recreation Area, NV


Heading into Pinto Valley, The Sentinel visible center. Our goal was a drainage somewhere in the center in this photo.
After leaving the approach road, we walked through the desert toward the drainage required to access The Sentinel.
Within the drainage.
Nearing the top of the drainage, The Sentinel in the back center.
Short sandy slope to reach the ridgeline.
The Sentinel ahead.
Close-up of the amazing layers on The Sentinel.
View back along the ridgeline at a loose section on crumbly rock.
View back along The Sentinel.
At the base of the slabs of The Sentintel. Keep along the base to keep the route Class 2+.
Class 3 slab ascent option. More fun, but more scary.
View west toward the summit of The Sentinel.
The Sentinel summit, view back to the east.
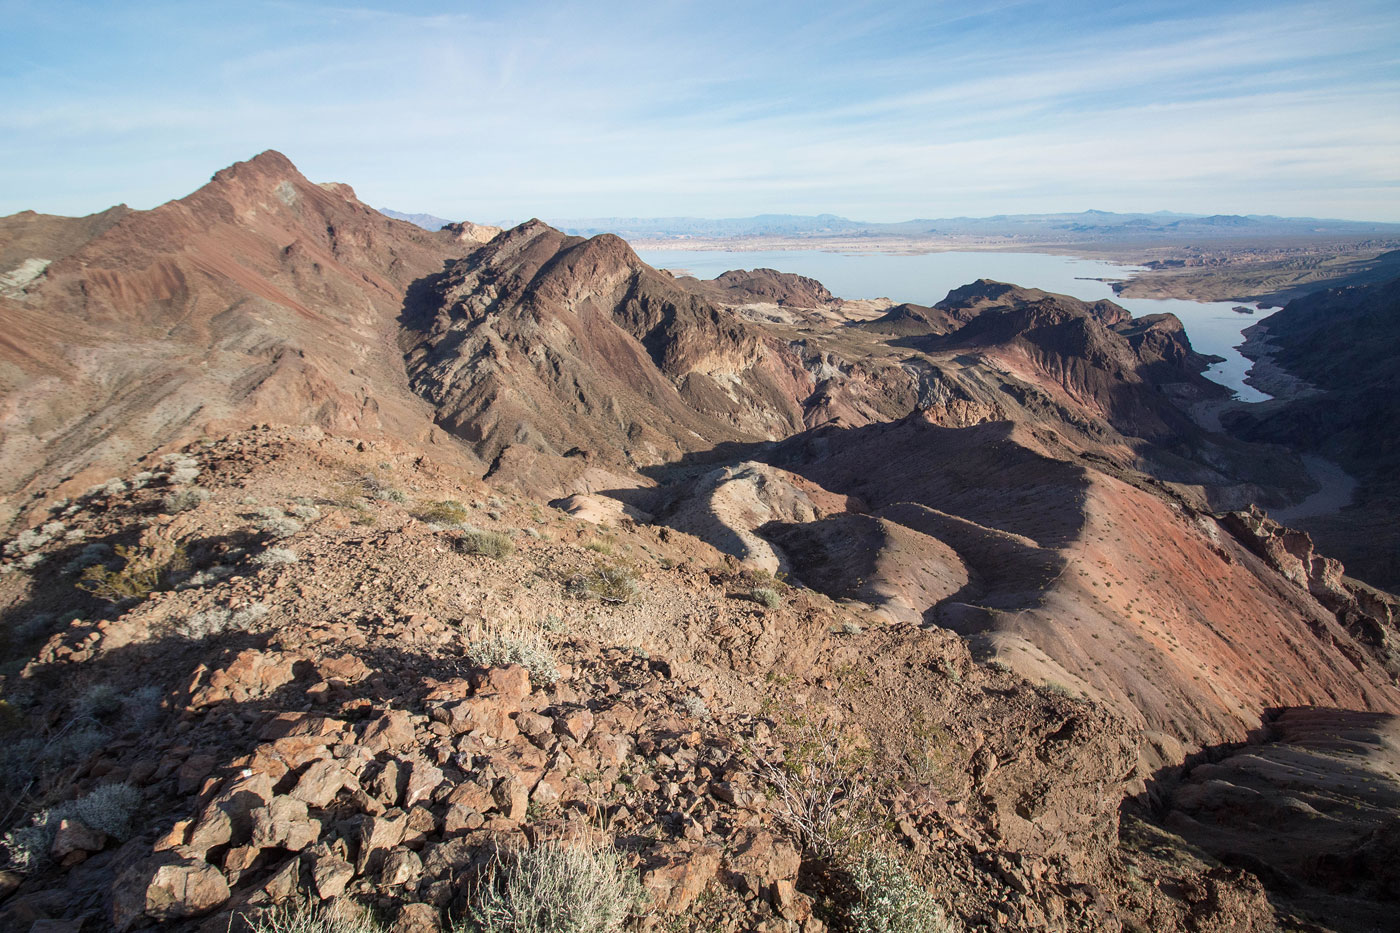
The Sentinel summit, view toward Lake Mead. Booths Pinnacle and Pyramid Peak visible on the left. Land's End Peak visible center right.
Back along the ridge as we head away from The Sentinel and toward Peak 3065.
Peak Peak 3065 summit, view toward Booths Pinnacle and Pyramid Peak. The wash we would use to access them is visible on the left. The drainage behind us would wrap around and bring us down there.
Jogging in the wash down from Peak 3065.
Booths Pinnacle ahead.
Our chosen side-hilling route to reach Booths Pinnacle.
Booths Pinnacle ahead.
Looking back (we ascended from the right in this photo), on our way to Booths Pinnacle.
Booths Pinnacle ahead.
Steep Class 2.
View back. We ascended from the ridge on the right. Pyramid Peak visible on the left.
The first section of Class 3 up Booths Pinnacle. I'm standing above the second section.
Wide shot of the Class 3 section, Pyramid Peak in the background.
Adam at the top of the first section of Class 3.
Booths Pinnacle ahead, some steep Class 2.
Booths Pinnacle, view toward Pyramid Peak. Muddy Mountains visible top right.
Lake Mead.
Along the ridge from Booths Pinnacle as we head toward Pyramid Peak.
Pyramid Peak ahead, just past the cliff band you might have seen in previous photos.
View back toward Booths Pinnacle.
View looking back at a Class 2+ ridge section. You can see Whiley coming down from it. The alternative is to head along the eroded side hill in the center of this photo.
Class 2 to the summit of Pyramid Peak.
Pyramid Peak, view toward Booths Pinnacle and Lake Mead.
Pyramid Peak, view toward the Muddy Mountains, The Sentinel in front of them on the right.
Heading down a weakness from Pyramid Peak to reach Saddle Mountain. This section was a bit loose and required some thought to make it around some small cliff bands.
Saddle Mountain ahead.
Saddle Mountain view into Boulder Wash.
Saddle Mountain, view toward Pyramid Peak and the small cliff bands we had to navigate to get down from it. We came from what appears to be rocks flowing down from the summit.
After coming down from Saddle Mountain, we headed down from its saddle with Pyramid Peak and encountered this dryfall (avoidable on the right). Just past this is another wash, where we kept right.
Heading up this next wash on our way to Land's End Peak.
Class 3 dryfall on our way to Land's End Peak.
View back toward Pyramid Peak (left) and Saddle Mountain (right) as we navigate the drainages on the east side of Land's End Peak.
At the head of our chosen drainage, ascending to Land's End Peak. The Sentinel is visible above.
Land's End Peak, view into Boulder Wash.
Land's End Peak, view toward Pyramid Peak (far left), Saddle Mountain (just next to it), and Boulder Wash (far right).
Our loose descent route we chose to take down from Land's End Peak. Boulder Wash is visible left of center. You can likely find a better way down.
View back toward Land's End Peak.
Heading back through Pinto Valley until we reached the road we left earlier.
Hire me or show me some love!
Hire/refer me as a web developer or send me a few bucks if you find my site useful. I’m not sponsored, so all fees are out-of-pocket and my time preparing trip reports is unpaid. I really appreciate it!