

Starting through the desert to The Raven, seen above.
Our chosen drainage, a Class 3 move ahead to escape from its growing cliffs.
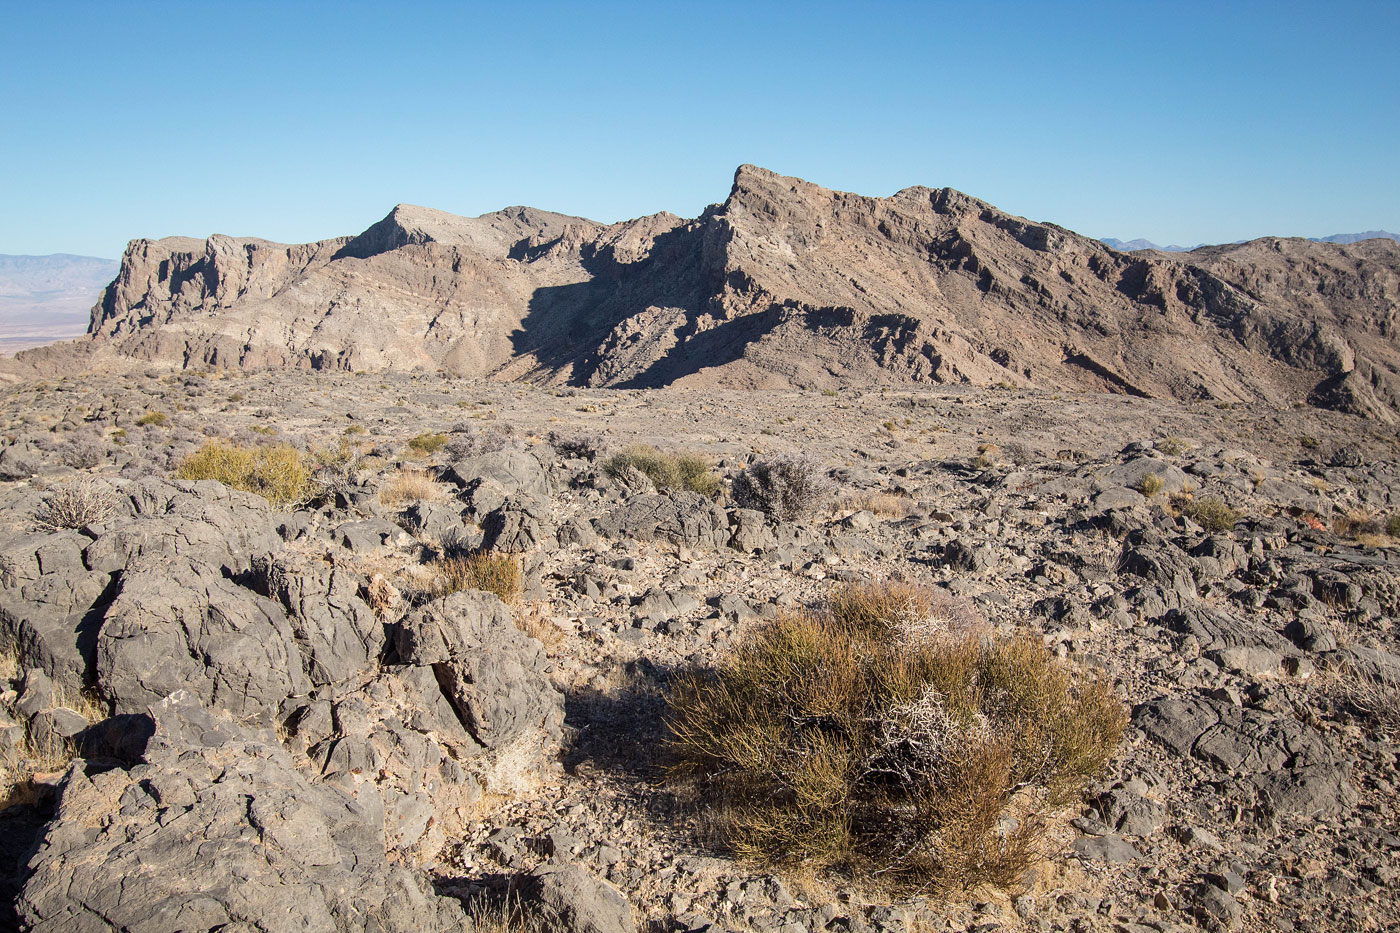
View back toward where we parked, center.
Class 2/3 slope to get to the northwestern ridge of The Raven.
View back down the northwestern ridge of The Raven. You can see Lake Mead on the right and the ridge we'll be coming down later at the end of the day left of center.
Fun Class 3/4 cliff bands.
Very cool stuff. The bands were separated by sections of light Class 2.
Another cliff band, and The Raven visible ahead.
The Raven summit, view north toward the second half of our route. We just came up the ridge on the bottom right.
Heading south off The Raven, East Longwell Ridge visible left, West Longwell Ridge right.
Descending from The Raven, East Longwell Ridge visible center.
Class 2/2+ descent from The Raven.
You can see the ramp we used to ascend East Longwell Ridge just above Luke's head.
Starting up the ramp for East Longwell Ridge.
Past the ramp, some more Class 2 and 3 stuff to play on to gain the summit.
East Longwell Ridge summit, view back toward The Raven. The Phoenix is visible on the left.
After descending from East Longwell Ridge, we headed through the desert to West Longwell Ridge, wrapping around to the right in the center of this photo.
View back toward The Raven (left) and East Longwell Ridge (right).
Class 2 to the cliff base of West Longwell Ridge. There's a weakness visible in the center of this photo.
Class 2/3 up West Longwell Ridge.
Navigating the cliff band below West Longwell Ridge, Class 3. The Raven visible in the distance.
It's only a small Class 3 section to gain West Longwell Ridge, but it was fun.
Final bit to West Longwell Ridge's summit.
On the way down along the north ridge of West Longwell Ridge. The Phoenix visible ahead.
Approaching the base of The Phoenix.
Class 3 downclimb on the way to The Phoenix.
At the base of The Phoenix.
Class 3 super fun up The Phoenix.
View back at the ridge we just hiked. West Longwell Ridge visible top center.
Summit of The Phoenix, onward to Fire Benchmark, visible right.
We thought we'd get cliffed-out, but not so!
Slightly exposed Class 3 downclimb from The Phoenix.
View back toward The Phoenix.
Fire Benchmark ahead. We wrapped around the bump coming up along the ridge, ascending almost to its summit to avoid the rougher-looking terrain on the right.
View back toward The Phoenix.
At the base of Fire Benchmark.
Very fun Class 3 stuff up to Fire Benchmark. Maybe Class 3+. Possible to add Class 4, if you'd like.
Higher up, it's a long, fun scramble.
View back down the scramble along Fire Benchmark's southwest ridge.
Fire Benchmark ahead, and views of Valley of Fire.
View back from Fire Benchmark. We came from the ridge on the right.
Close-up toward Valley of Fire. Also Peak 3740 left, and Peak 3399 right.
Descending Fire Benchmark's north ridge. Peak 3740 center.
Avoiding the scary ridge crest on easier terrain to its right.
Easy desert walking to the base of Peak 3740.
View back toward Fire Benchmark and a short Class 3 cliff band we had to overcome.
Approaching the base of Peak 3740.
Class 2 at first.
Then Class 3 up the southeast ridge of Peak 3740.
View back along the ridgeline we scrambled up.
Summit of Peak 3740, view toward Fire Benchmark, which we just came from.
Close-up toward Peak 3399 (left middle bump), and North Fire (top center). Also of note is the scary-looking cliffy ridge we'd be avoiding at the base of Bighorn Peak (right of center).
Somewhat loose start to the descent from Peak 3740, then easy desert walking. View back up at our descent from Peak 3740.
Onward to Peak 3399. You can see the cool arch on the top right in this photo.
Peak 3399, view back toward Peak 3740.
Just off to the side of the summit, a nice arch.
Close-up toward Valley of Fire.
View toward the Northern Fires. Bighorn Peak center.
Descending from Peak 3399 along the ridgeline. We ascended the ridge up to the shadows below the cliffs of Bighorn Peak.
We side-hilled on a solid animal trail below the cliffs of the ridgeline.
View back.
Some light Class 2 exposure along the base of the cliffs. The terrain can get a little loose, but it went quite well.
Another shot back, Peak 3740 in the distance. We hugged the base of Bighorn Peak's cliffs and followed animal trails, hoping they'd lead back to the ridge crest.
Another shot back along the traverse beneath the cliffs. Bighorn Peak visible top left. As you can see we haven't been able to ascend to the ridge crest yet due to cliffs, but a weakness presented itself soon!
Eventually we got to a short Class 3 section to regain the ridge crest.
After a quick hike up to Bighorn Peak, onward to North Fire Peak, center.
North Fire, view toward Bighorn Peak.
Along the ridge from North Fire Peak to North Fire Peak - East Peak.
North Fire Peak - East Peak, view back along the ridgeline (you can see Luke coming up on the left), and Valley of Fire in the distance.
North Fire Peak - East, view toward the ridgeline to come. Most of the scrambling is done by this point, but there was still some distance.
Peak 3363 ahead.
Approaching the base of Peak 3363. Alternatively, you could descend into the canyon on the right and down-climb a Class 3/3+ set of dryfalls, which I encountered last time in the area.
Class 2 to Peak 3363.
Peak 3363 summit, view toward Lake Mead and more ridgeline walking.
Sunset in the Fires. You can see the ridge we'd be descending in the center of this photo.
Class 2 descending. Northshore Road visible below.
Descending the ridge.
Luke at a drop-off along the ridgeline. Instead, drop to the right onto the mellower terrain below on the right.
Class 3 downclimb from the scary ridge crest.
Luke posing by the cool canyons below.
A road run/walk back to our cars, view back toward the ridge we descended (just right of the major canyon). As you can see about halfway up is a scary-looking cliff band, which we had to drop off of. We were happy there was light to navigate down. Excellent day!
Hire me or show me some love!
Hire/refer me as a web developer or send me a few bucks if you find my site useful. I’m not sponsored, so all fees are out-of-pocket and my time preparing trip reports is unpaid. I really appreciate it!